Solventum
Jul 6, 2026
/ Anterior restoration longevity
June 1, 2026
How do you treat deep stains? The resin infiltration technique is a good option for treating deep white spots; however, in many situations, the result is unsatisfactory, and a resin restoration is necessary. Discover how Dr. Calixto used 3M™ Filtek™ Supreme XTE Universal Restorative to treat smiles for the long term.

How do you treat white or brown spots on enamel and ensure long-term results? There are a number of reasons why these unsightly spots may appear on teeth, including hypomineralization or demineralization — and there are likewise several treatment options available based on the depth of the staining.
Microabrasion is the most common treatment option and the least invasive. It’s a cosmetic procedure that removes white or brown stains using a paste made of acidic and abrasive particles to remove superficial staining, such as from fluorosis. It’s always worth trying microabrasion first because it’s a more conservative option. You can retain almost all the enamel, remove the superficial staining, change the refractive index, and get very good results. However, this treatment is only really applicable to surface-level stains (at about 0.2mm of enamel). When the staining is deeper, you may need to move on to other treatment options.
Resin infiltration techniques are a good option for medium stain depths (up to 1mm). I would try infiltration as my first or second option because you can minimize discoloration, but in some cases it also isn’t enough. In cases where the stain is deeper (more than 0.5mm), conservative restorations with composite resin are a great alternative with long-lasting results. Although in most cases it is necessary to remove 80% or more of the stain, the wear is usually limited to just the tooth enamel. In this article, we’ll explore a clinical case of white spots that required composite restoration and how the right materials and maintenance provided esthetic, long-lasting results.
A 15-year-old patient presented with white spots located on the middle and incisal thirds (fig 1). After trying more conservative enamel microabrasion, the stains remained unchanged. At the time, infiltration techniques were not available, so direct composite restoration was the best alternative for these deep stains.
When performing shallow restorations like this, it’s important to know your material’s opacity levels. The shade systems of enamel, body and dentin can be very complex. In order to deliver natural-looking results, it is essential to understand the intricacies of your material’s shading system and how it aligns with the tooth’s natural translucency.
Depending on the situation, a body shade may be enough to reach a balanced opacity — you can use a body shade as a superficial dentin or even an enamel layer. But sometimes, a body layer alone won’t allow you to reach a highly translucent appearance and requires an enamel layer to get an esthetic result. In shallow preps like this case, I like to use a combination of body and enamel shades.
I chose 3M™ Filtek™ Supreme XTE Universal Restorative for this case not only for its handling and polish but also because it has a body opacity option, which can function as a less opaque dentin. This is ideal for cases of shallow wear — as was the case for teeth 11 and 12 — and prevents the last layer of enamel from becoming thicker than 0.5mm, which can cause it to appear grey. Unlike systems that have only dentin and enamel opacities that could result in an overly opaque final appearance, Filtek Supreme Ultra Universal Restorative gives us a “happy medium” between body and enamel, as we didn’t need to mask anything and didn’t need high opacity.
In this case, we didn’t put composite resin on the whole buccal surface, just one or two thirds of the buccal face between the incisal and mesial third. We didn’t remove dentin, so we only needed a little bit of body shade and then enamel. This procedure was performed only at the enamel level (fig. 2).
In recent years, we’ve seen more and more simplified shading systems pop up on the market, from one-shade to minimal shade options, like 3M™ Filtek™ Easy Match Universal Restorative. However, I don’t believe that one shade can truly match the whole Vita shade guide, or that one opacity can cover all situations. There are too many variables involved in dental optics for there to be a truly one-size-fits-all solution.
Materials like Filtek Easy Match Universal Restorative, on the other hand, show a lot of promise. Filtek Easy Match Universal Restorative features three shades and a naturally adaptive opacity — meaning its opacity increases along with material thickness to adapt to different clinical situations. I’m very intrigued by this feature and how it will change the way we restore smiles.
The biggest challenge of this case was maintaining the color and shine of the resin over time. Therefore, a good material, proper light curing, and maintenance are essential to preserve the natural-looking blend between resin and tooth.
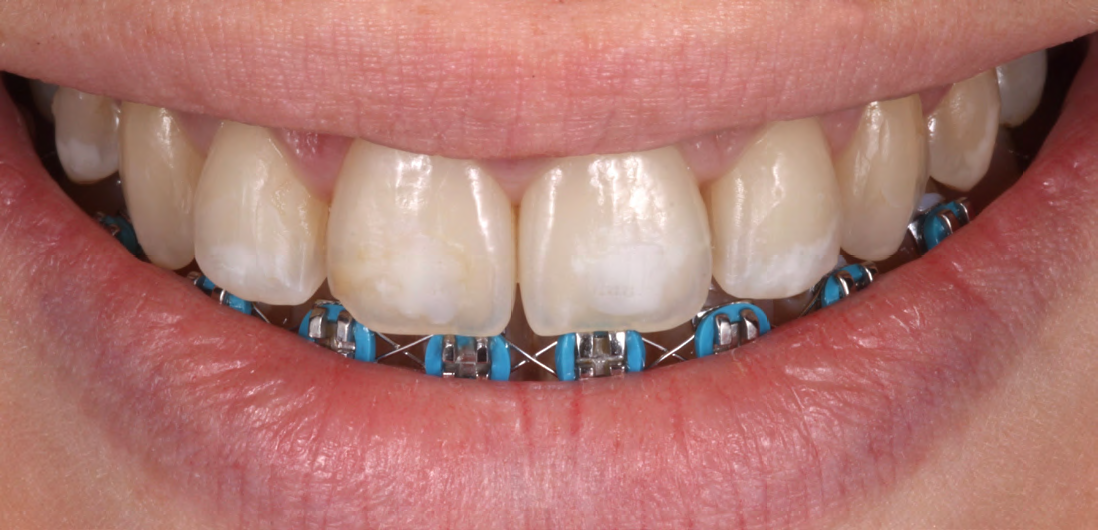
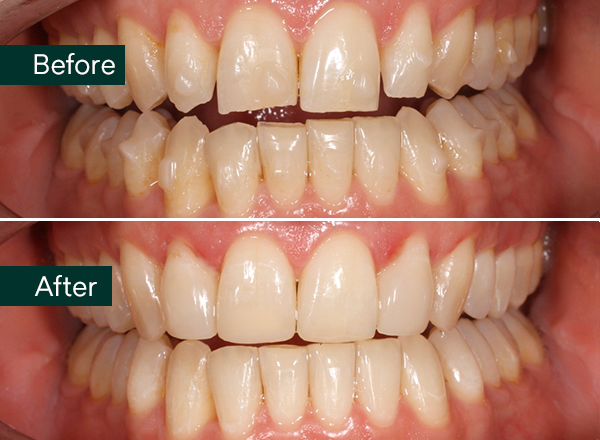
Figure 1: Initial situation with white spots on the central (11 and 21) and lateral (12 and 22) incisors.
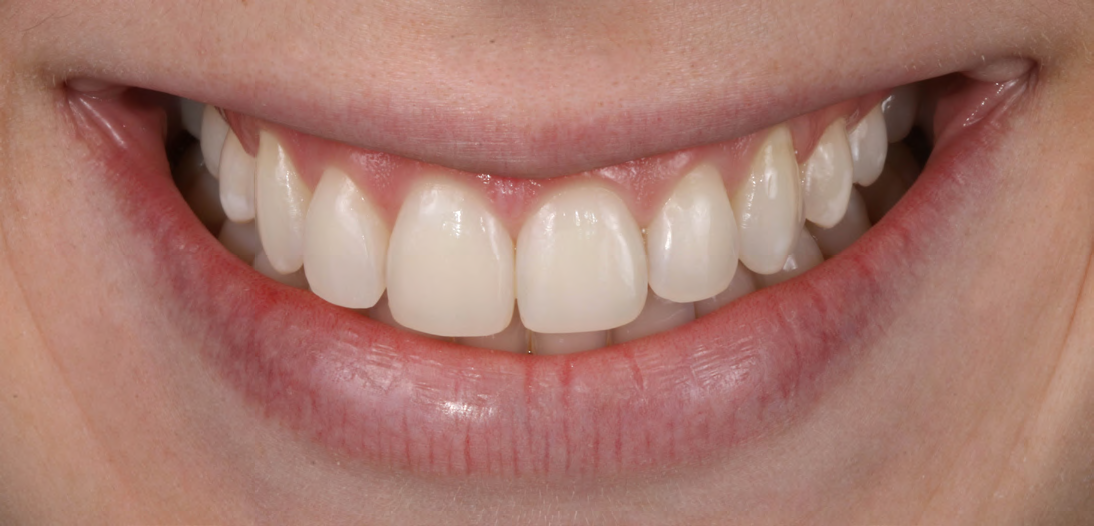
Figure 2: Results after white stain removal and restoration.
No matter how advanced your material or how well placed, your restoration is only as good as its light cure. Improper polymerization can compromise the quality and longevity of the restoration and lead to failure. But you can’t tell that a restoration is cured correctly just by looking — often you don’t know the restoration has been improperly cured until the consequences appear.
Many clinicians assume that just because the light is blue and the composite is hard, that the degree of conversion is sufficient, but it might not be. For example, if you cure for 10-20 seconds and actually needed 20-30, you will spend more than those extra 10 seconds fixing the problem down the road. My advice is to:
In addition, I do a second finish and polish three days after the initial restoration — which I’ll explain in more detail in the next section.
Composite restoration maintenance time through return polishing depends on several factors, such as correct polymerization, quality of polish, material type, hygiene and patient habits, among others. Therefore, establishing a universal “correct” timeframe for re-polishing isn’t possible and should be adjusted on a case-by-case basis.
My maintenance protocol begins immediately after the restoration with an initial polish, then another approximately three days after restoration. There is evidence that the composite’s degree of polymerization is better 2-3 days after the final light curing, which is why I take this extra step.¹ After that, I believe that a follow-up polish with a rubber cup and/or felt wheel and polishing paste every two years is sensible. It’s important to note, however, that it isn’t necessary to repolish at every appointment — in fact, it can actually be detrimental to do so. Some patients may start to show stains and loss of gloss at 2 years, while others will maintain a satisfactory polish after 6 years.
For this specific case, the patient spent 5 years overseas and I had no contact with them during that time. It wasn’t until 6 years after the initial restoration that I was able to see her again and do another finish and polish protocol (fig 3), then again after a total of 13 years (fig 4). I was pleasantly surprised at how good the surface was without any kind of maintenance for this particular patient. Even 13 years after the clinical case, the resin remains satisfactory, but still must be monitored in case it needs repair or replacement.
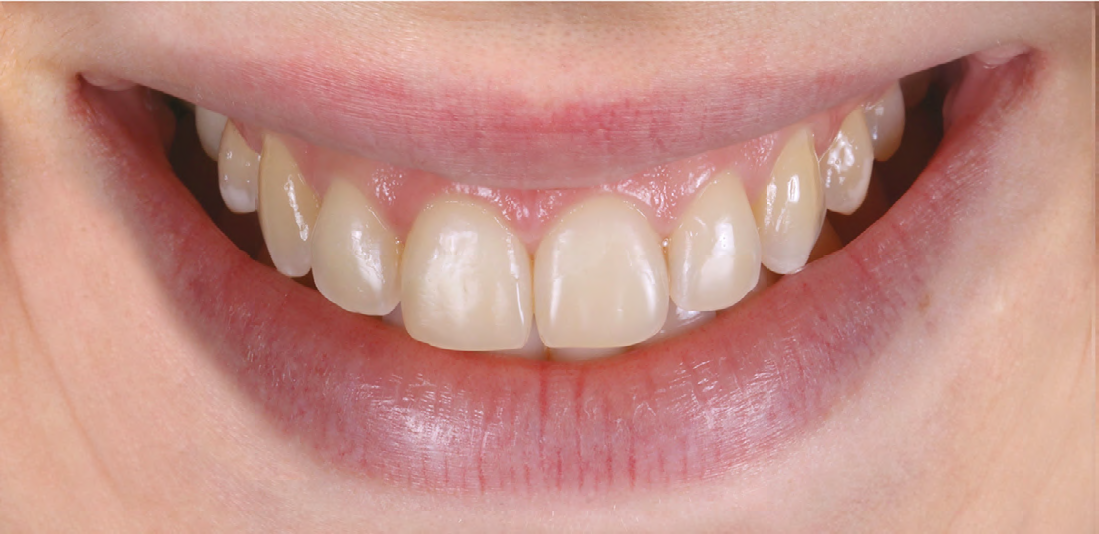
Figure 3: Return after 6 years without maintenance polishing.
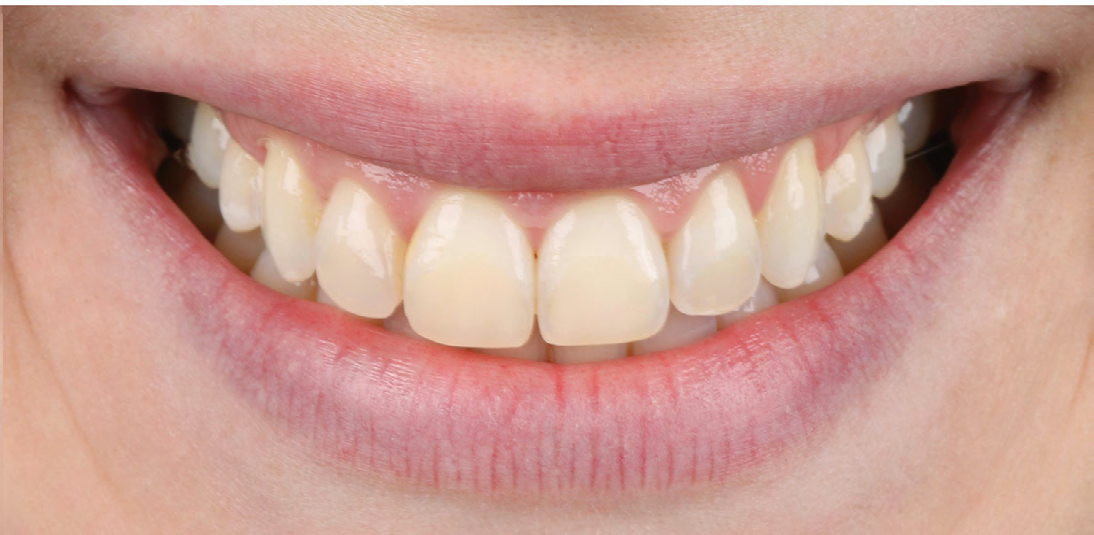
Figure 4: Return after 13 years and after maintenance polishing.
As mentioned above, the patient’s hygiene and habits can have a big impact on restoration longevity and how often you need to repolish. Acidic beverages, coffee, and energy drinks can all affect the quality of the restoration, but it can be difficult to nearly impossible to convince patients to change their habits. For example, many of my patients want to bleach their teeth but simply love coffee too much.
For patients whose diet affects the longevity of the restoration, my advice is to have the patient come back more frequently to maintain the surface of the restoration. After all, it is an artificial tooth. Like a car, it requires regular maintenance and good habits to keep it looking good.
While stain removal with anterior restoration may seem like a step backward from more conservative microabrasion, it can be a valuable tool for treating deep stains. Plus, it has the potential to provide long-lasting results that your patients will love for years to come.
However, there are a number of factors to keep in mind to ensure this longevity, including your material’s available shades and opacities, your light curing and maintenance protocol, and the patient’s unique circumstances. Choosing a material like Filtek Supreme Ultra Universal Restorative can help give you a leg up — but only if used and maintained properly.

Become a part of our Brain Floss blog family and share your clinical case, your insights and your skills with this great community .
We are looking forward to hearing from you!!
1. Boaro, L. C., Gonçalves, F., Guimarães, T. C., Ferracane, J. L., Pfeifer, C. S., & Braga, R. R. (2013). Sorption, solubility, shrinkage and mechanical properties of “low-shrinkage” commercial resin composites. Dental materials: official publication of the Academy of Dental Materials, 29(4), 398–404. https://doi.org/10.1016/j.dental.2013.01.006